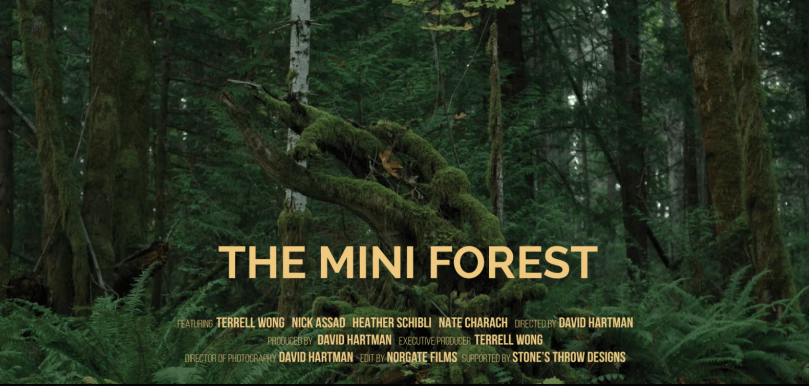
David Hartman is one of my favorite film makers. Based out of Ontario, Canada, his messages and themes hit close to home for me. His filming style is thoughtful, well-paced, beautiful and a breath of fresh air compared to the overstimulating films and movies of today. I came across “The Mini Forest” and thought I would share. The film speaks to sustainability, growth, and how our individual actions can have profound effects on the earth. It has certainly got me thinking about my own lawn…
“Terrell Wong is about to plant 100 trees in her small Toronto backyard, a dense mini forest based on the Miyawaki Method. What at first seems like a simple act soon evolves into a complex story about dirt, lawns, fungus, wildlife, native species, and finally the human brain. An anti-lawn anthem from director David Hartman, The Mini Forest explores this innovative form of afforestation and the importance of restoring the native woodlands that once covered so much of Canada and the World.”
I hope everyone is having a safe and happy holiday season. Things can be especially busy and hectic this time of year so don’t forget to take some chill time, relax, go outside, or watch a canoe documentary. I found this one recently online and it’s pretty awesome. This one features 6 friends who spend 2 months in the Yukon and Peel watershed. Happy Holidays everyone.
“This documentary is a captivating documentary chronicling the 1,500-kilometer, two-month canoeing expedition of six adventurers through the pristine wilderness of Canada’s Yukon and Peel Watershed. This thrilling journey traverses six rivers in three canoes, capturing not only breathtaking landscapes but also the profound cultural and ecological significance of the area. A chance encounter with a First Nations family transforms their adventure into a mission to spotlight the urgent need to protect this fragile and unique ecosystem from industrial development. The film blends the grit of exploration with a heartfelt environmental message, showcasing the resilience of nature and the enduring traditions of those who call the North home.”
I’ve spent more time slowly down this Spring and catching up on independent films and documentaries. I came across this gem from The Guardian featuring a man, who lived in Yellowstone National Park, working as the park’s winterkeeper. The story is told beautifully and the videography makes it a joy for the eyes to watch. I hope you all enjoy. Its about 12 minutes long.
“Steven Fuller is a winter caretaker who has lived at Yellowstone national park for the past 50 years. As the cold weather approaches and the seasonal transformation begins, he hunkers down in his remote mountain cabin. But Fuller and Yellowstone face an uncertain future, with the climate crisis threatening to forever change one of North America’s last great wildernesses.” – The Guardian
After watching the documentary, I reflected on my own personal experience traveling to America’s first national park in 2018. Yellowstone is really a magical place. I spent only 1 week there but I feel like this already magical place would be even further transformed each season. I hope to go back once my kids are older. Below are some of my favorite shots from Yellowstone National Park in 2018.
I came across this fascinating documentary from the CBC (Canadian Broadcasting Corporation) featuring the last full time guide in the iconic Algonquin Park. I had to share it with all of you.
“Meet Frank Kuiack, the last traditional fishing guide in Algonquin Park. Kuiack carries a lifetime of stories and wisdom about the Algonquin. His magnetic personality, skills on the water and knowledge of the park’s intricate lakes and trails has inspired two novels. When Kuiack was eight-years-old, a group of American anglers offered him $5 to show them where to catch fish — and he’s been making his living as a fishing guide ever since. At 84-years-old and recently diagnosed with bone cancer, Frank’s health has taken a turn for the worse. While he’s attempted to train guides over the years and pass on his knowledge, the physically demanding nature of the job has turned away most potential apprentices. Kuiack’s niece, Sharleen, has shown a unique ability to go toe-to-toe with Frank on the water but, despite her ability and love for her uncle, she remains unsure how to carry on his legacy or whether she desires to be the next “Last Guide.” Additional footage provided by: Gentec International/Sigma Canada” – CBC Docs
For myself and many other Canadians, Algonquin Park holds a special place in our hearts. Growing up in Ontario, we spent many summers canoeing and camping at this park. In 2014, my brother and I made a journey back home to do a week long canoe trip. I can’t believe that’s been 10 years now at that this point! As the kids get older and older, I’m starting to feel the itch once again to get back home. Hope you all enjoy.
In 2014, my brother and I did a 7 day loop to Big Trout Lake in Algonquin Park, Ontario, Canada. It was actually this trip that sparked my interest in creating this blog!
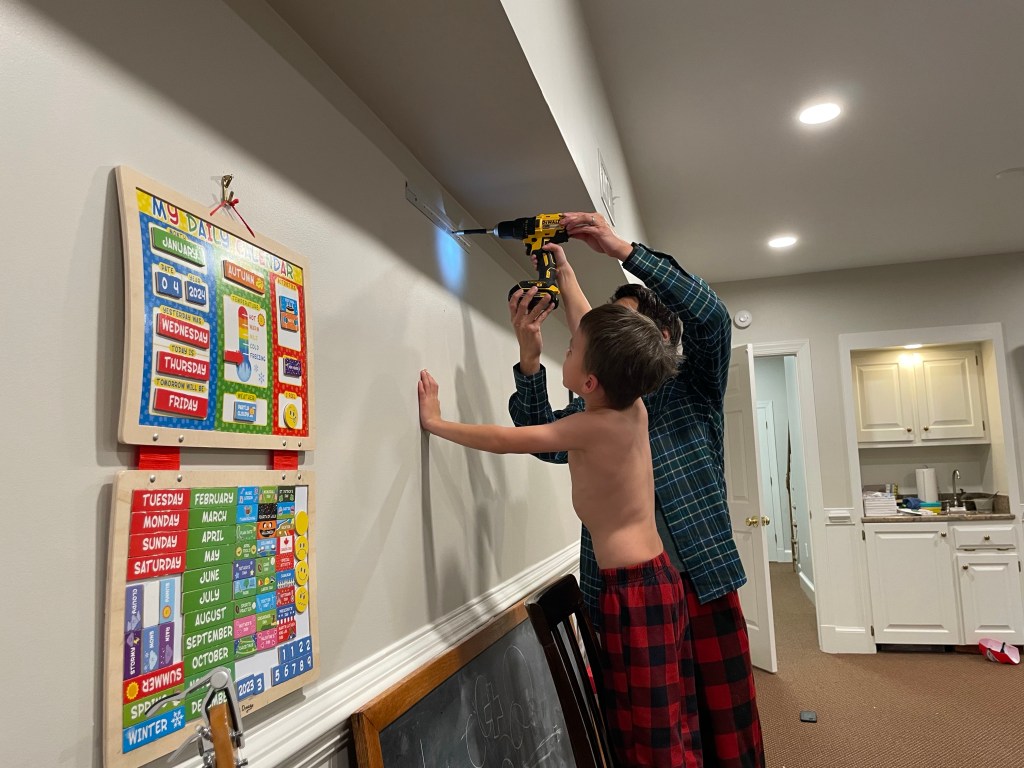
Last year, we felled an old chestnut oak tree in our front yard that had succumbed to illness. We were certainly sad to see this magnificent old tree fall. We took that opportunity, to teach the kids about the cycle of trees and we ended up growing our oak own trees from acorns to continue the cycle.
We grew some oak saplings from acorns to learn about the tree cycle.
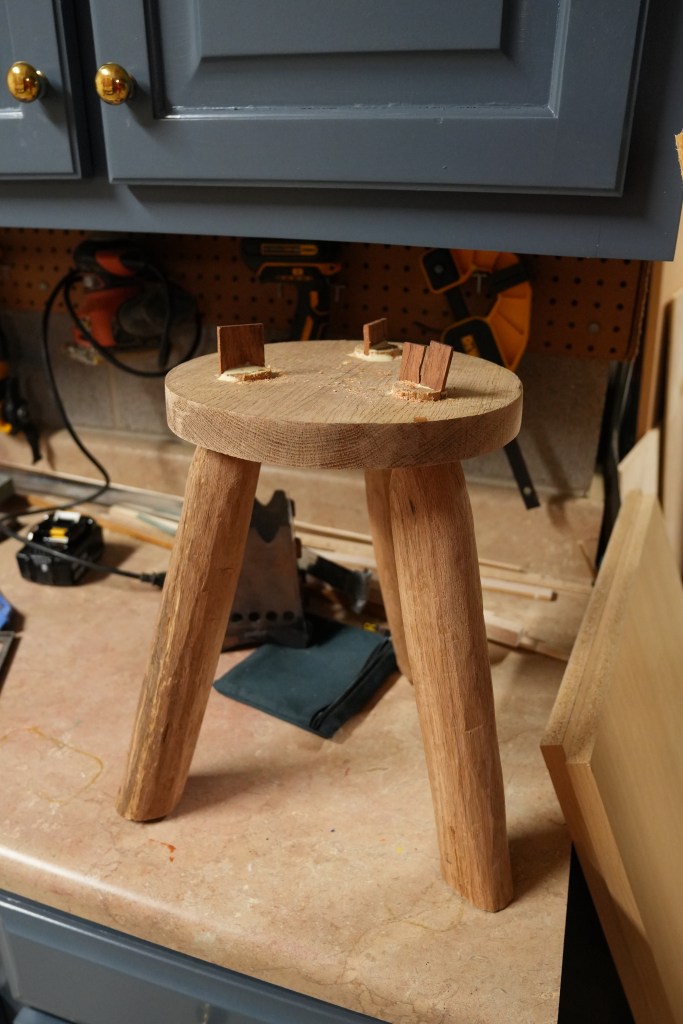
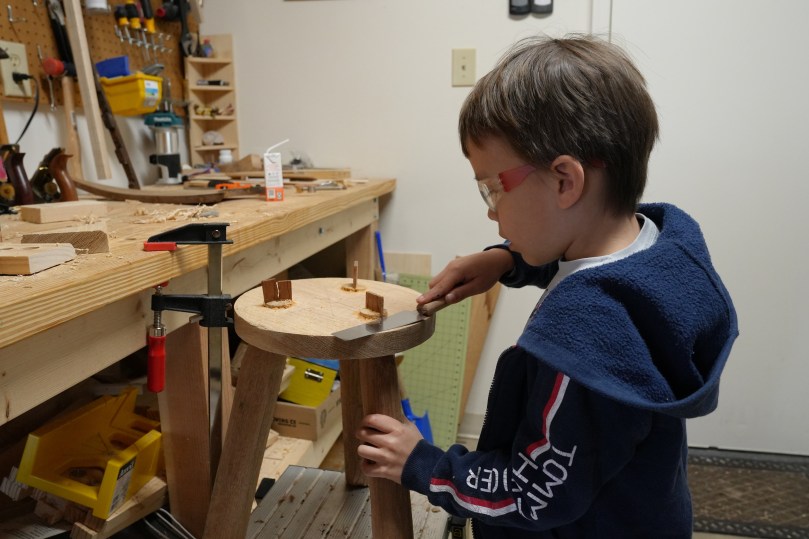
We split the oak into many cords of firewood and left it to dry. About a year later, we decided to find a way to let to celebrate this old tree – we were going to turn it into a milking stool. Why you ask? Because we have several cows that need milking. No, just kidding. As the kids become more involved in the workshop, we needed another stool for them to sit on. Also, it is a great project for using hand tools. Power tools would make it certainly easier, but where is the fun in that. Also I guess they are too young for that.
Draw knife action on white oakDraw knives will turn a block of firewood into a smooth cylinder leg.a Shinto rasp is also helpful to smooth rough corners. It works very well.
It appears that milking stools have been around for at least 2000 years. The 3 legged design allowed milkmaids to get low to the ground and lean forward without toppling over. Also, the 3 legged design was more stable on uneven surfaces than a four legged design. In 19th century England, cows could be milked in the fields or in cowsheds. These were traditionally constructed out of elm with legs of ash. Our milking stool will be much heavier, we are using chestnut white oak for the legs, and then white oak for the seat. It will be a very Virginian stool (we love white oak).
The legs are set at 20 degrees. Make sure to mark 120 degrees apart to give you equal spacings between the legs.
After selecting 3 pieces of chestnut white oak, we got to work to make them as cylindrical as possible. This was done using 2 different draw knifes. We have a “rough” draw knife, that we use to strip bark, and then a finer, sharper one for the more precise work.
We used teak wood for the wedges. Here it is drying.
I purchased a board of white oak from the local woodcraft to cut out of a circle for the seat. Using a Number 4 hand plane, this was then smoothed to remove all rough spots and to flatten it as much as possible. 3 points equidistant from each other were then marked out on the seat using a compass. I used a bevel gauge as a reference to gauge 20 degrees from the normal. This is the angle at which I will be drilling out the mortises for the legs. I used a forstner bit at 1 3/4″. Once these holes are drilled. The tenons were then finely shaved to fit through the mortise. The tenons were then cut into, to allow room for a wedge to be driven.
For the wedges, I wanted a different type of wood that would stand out visually. So I used an old piece of teak. These were then sanded down to the shape of a wedge. Once the tenons were securely placed through the mortises, the teak wedge was then glued and driven through the cut in each tenon. This will keep the joint tight.
Once it has dried, you can cut off the excess wood with a saw. A block plane can help level the seat once again and then sanded. The legs were then leveled with the ground and cut. All edges of the legs were chamfered in order to reduce the likelihood of the legs splitting and chipping.
Once it is dry, you can cut off the excess wedge and excess tenon for a flush cut.
For the finish, we kept it very simple with a couple of coats of boiled linseed oil, this certainly helped to bring out the grain of the oak. For the last coat, I applied a layer of beeswax.
Overall, it was a very fun project to do with the kids. There was a lot of cutting, shaving, hammering and sanding. What more could you ask for? Now, time to find a cow.
After a couple of coats of linseed oil and one coat of bees wax, she’s ready for use!
Learn about significance of the milking stool in women’s history.
This guy is named Eoin Reardon, he is fantastic woodworker from Ireland. He shares how he makes his milking stools.
Be safe when working with tools! Make sure you’re wearing the proper eye protection! Have fun and be healthy!
There are 2 types of people in the academic world: a white/dry erase board person or a chalkboard person. After high school, I continued my education for 13 more years. During these 4 years of medical school, 3 years of internal medicine and 3 years of ophthalmology, I can emphatically say, that I am a chalkboard person.
3 x 5’ old classroom chalkboard I found on Facebook marketplace for $35
Are there pros to a dry erase board? Absolutely. No chalk dust, no messy brushes, no need to go outside and dust the brushes off. Personally, I just never liked the idea of throwing away marker after marker into the trash bin once they were depleted. I didn’t care much for the smells either. For me, the chalkboard was more traditional, more fun, and I guess I grew up in the era of chalkboards.
When it comes to explaining things to my kids, I am definitely a visual teacher. When it comes to explaining concepts, nothing beats having it displayed in stark contrast, in black and white on a clean chalkboard. Whenever I need to explain a concept, with the chalkboard, I can show all 3 kids at once.
French cleat to hang it flat on the wall
I searched Facebook marketplace for quite some time to find a board with the proper dimensions. My journey took me eventually to Mechanicsville, Virginia in the woods, where a very nice lady, sold me, an old classroom chalkboard that measured 3 x 5 ft. It was old, but perfect for our needs. I paid $35 dollars for it.
French cleat worked great
Taking it home, we cleaned it, sanded it, and applied several coats of Danish oil to bring new life to it. Using a metal French cleat system, it was mounted to our wall and ready for action.
Long live chalkboards
This chalk is also awesome: Hagoromo chalk from Japan.
Happy new year everyone! Wishing everyone good health and good luck
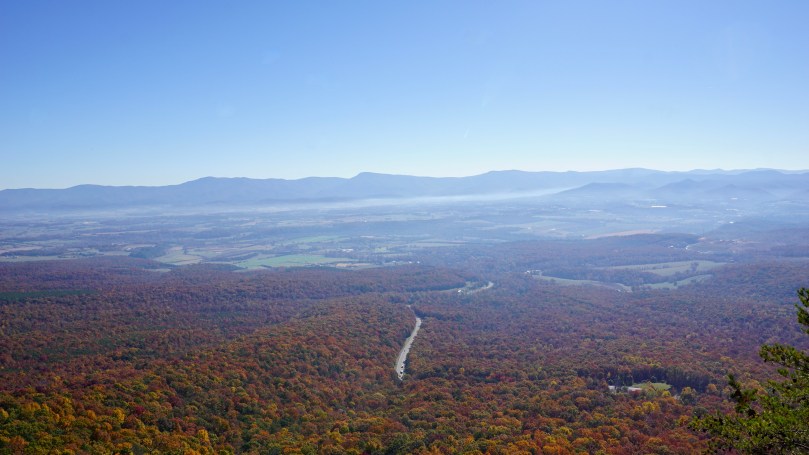
We try to make it out to the Blue Ridge Mountains of Virginia for vacation during peak fall foliage time each year — a chance to breathe in the cold mountain air, watch the colors change and reset as a family.
We stayed this time in Massanutten (a census designated place), in the heart of Shenandoah Valley of Virginia. Much of the attraction to this area centers around the ski-resort, however during the fall time it served as a great base for us to explore the surrounding region.
Massanutten, VA
One of the first adventures took us to the Massanutten Story Book Trail, located in Shenandoah County. It was a short, paved hike about 0.7 miles long. It was perfect for our family with kids of ages 5, 2.5 and 8 months. The trail is paved and very accessible for the most part. There are numerous boulders and a wide array of oak species to explore. The view at the end is pretty spectacular – with Shenandoah National Park in the far distance. We took this trail on in late October and I was surprised that there were a lot of gnats about, so be sure to pack some bug spray.
Parking area for the Story Book Trail. These mountain mites are ready to explore.The view atop the Story Book Trail. Shenandoah National Park is visible in the far distance.
One of the highlights of our trip for the kids was visiting Showalter’s Orchard and Greenhouse in Timberville, Virginia. On a weekday, we found that we had the orchard mostly to ourselves. The kids got to enjoy some donuts, cider and apple treats. The trees in the orchard were packed with apples and were low lying. Fuji apples were in season at the time and the kids had no trouble filling up the bags. Old Hill Ciders are also pressed and made at this same farm in Timberville. We were blessed with spectacular clear skies.
Showalter’s Orchard in Timberland, VA
The Massanutten ski resort area still had plenty of activities for the kids in the off season. There were playgrounds, ponds to fish, a water park, trails to explore, restaurants and even an area for gem hunting. The kids were never bored.
Painter’s Pond in Massanutten, VAPainter’s Pond in Massanutten, VA
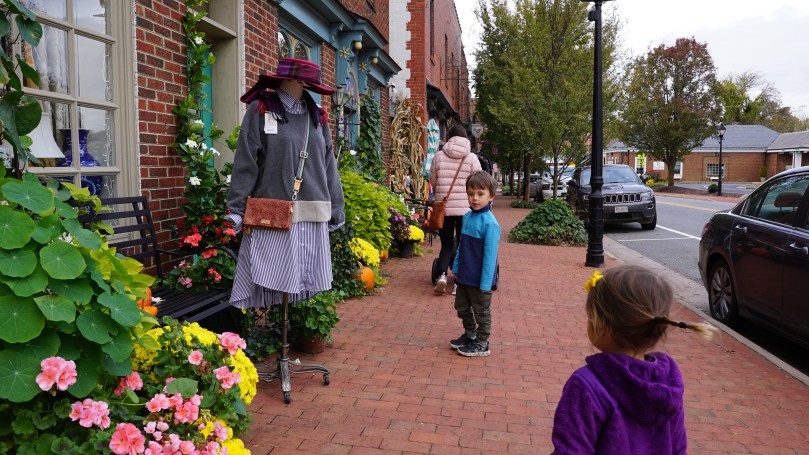
On our way back home, we made a stop in the small town of Gordonsville, Virginia for a lunch break. A local recommended The Jackson and Company Market and I’m glad that they did. It was a chilly fall day and it was the perfect place for the kids to warm up with soup and for the grown ups to have coffee. With a population of approximately 1500, the main street was where all of the action seemed to be. Shops were busy and people were getting ready to put up the town’s Christmas lights. There was even a blacksmith shoppe that we unfortunately didn’t have time to check out, but I guess it’s just more reason for us to come back to the mountains. We’ve been coming to the Virginia blue ridge and Shenandoah for years, and maybe we’re just simple folk, but it just seems like there’s endless things to see, do, and enjoy in this special place.
Main Street of Gordonsville, VirginiaA warm place for soup, quiche and coffee. The Jackson and Company Market in Gordonsville, Virginia was perfect on this chilly fall day.
In traditional dad fashion, I filmed our trip on my trusty a6000. I’ve had the camera for 8 years, and it’s still going strong.
After almost 2 years of growing, my son and I were excited to harvest our first bag of Chesapeake Bay (Eastern/Virginian) oysters. It has been several months since our last check on the float, we found the whole thing was actually submerged due to the weight of the now much heftier oysters. This was really not an issue, as the oysters were protected in a cage. When we initially placed these guys in their cage, they were called “spat” not much larger than big sunflower seeds. After 2 years of filtering the brackish waters of the bay, several of these guys were actually larger than 4 inches! This was our first growth cycle, and it has certainly been an interesting and fun experience.
April 2022
While we sat around the grill preparing a feast, we reflected on what we have learned:
Raising oysters is very easy. If you have a sturdy oyster float, and access to the water, you can raise oysters. They really don’t require much. They simply need to be upsized into bigger bags and cages and they grow. This is usually done every several months. If you also want to keep them separated and growing beautifully, shake and jostle them around in the bags so that they don’t grow to one another. This will also cut down on barnacle growth. Hosing them down every once in a while, will also keep algae off and keep them in better shape for harvesting and bringing to the table.
The spat is not expensive: $35 can buy you a bag of 1000 oyster spat.
1 oyster can filter 50 gallons of water in one day. This is why they are essential animals in the battle of cleaning up the Chesapeake Bay.
The “R” rule doesn’t necessarily pertain to these types of oysters (triploid, sterile) . Seafood enthusiasts have always followed the “R” rule when it came to eating wild caught (diploid) oysters: “Eat wild caught oysters only during the months with the letter “R” in it.” There are two reasons for this rule.
Food safety: eating raw shellfish, always carries the risk of food borne illness from bacteria such as vibriosis (caused by the bacteria vibrio vulnificus). The risk of contracting this illness is higher during the summer months when the water is warmer. The reality is that this illness can be contracted from eating raw shellfish during ANY time of the year. It is more prevalent during the warmer weather however due to more favorable conditions for the bacteria to proliferate. Properly cooking your oysters can virtually eliminate the risk of catching this infection. The CDC estimates that approximately 80,000 people get vibrio infections each year and 100 people die from it each year in the United States. I always eat my oysters cooked.
Taste: Wild oysters are diploid organisms, meaning they carry a set of chromosomes from each parent. Farm raised oysters for the most part have been selected and altered to be triploid, meaning they actually carry an extra set of chromosomes. These oysters are sterile and do not reproduce. During the warm summer months is when wild oysters are active in the reproduction cycle. During this time, the oysters under go physiologic changes which alters their taste. They are more watery, bitter and just not tasty. Many of the restaurants that serve oysters year round, serve farm raised, triploid oysters. Triploid oysters grow faster because they do not go through the reproductive cycle. All o their energy is put towards getting larger. They grow to bigger sizes and they maintain their taste throughout the year.
Oysters are highly nutritious!
Eastern Oyster (Crassostrea virginica) nutrition facts per 3.5 oz serving. (Approx 3 oysters)
Calories: 79.
Protein: 9 grams.
Carbs: 4 grams.
Fat: 3 grams.
Zinc: 555% of the Daily Value (DV)
Vitamin B12: 538% of the DV.
Copper: 493% of the DV.
Selenium: 56% of the DV.
7. Be safe when shucking oysters. Wear proper gloves when handling the cages and the oysters as their shells can be razor sharp.
Location: Sherando Lake Recreation Area, 96 Sherando Lake Rd, Lyndhurst, VA 22952
Latitude : 37.919724, Longitude : -79.01
Date: 10/21/2021
The George Washington and Jefferson National Forests contain almost 2 million acres, with most of these acres in Virginia (1,664,110 acres). The remainder is mostly in West Virginia (123,629 acres) and then Kentucky at 961 acres. It is home to some of the most beautiful mountain lakes in Virginia. Lake Moomaw and Switzer Lake are two of my favorites. I’ve heard much about the popular Sherando Lake, which is probably the most popular of the lakes given it’s ease of accessibility and plethora of facilities and amenities. Many people come here to swim, camp, hike and of course fish the stocked trout.
During a week long trip out to the Blue Ridge Mountains, we made a day trip to Sherando Lake to check it out. With 2 little ones in tow, we hiked an easy trail around the lake at 1.4 miles with very little elevation gain of about 100 ft. The spring-fed lake is small at 25 acres, but picturesque. The entrance to the lake is magnificent, with small stone bathhouses and small bridges that cross meandering creeks. There is a designated beach area for swimmers which I’m sure is packed during the summer months. The trees were starting to turn in late October and the air was crisp.
If you are thinking about heading to Sherando Lake for a day trip or for a camp out, just do it. You won’t be disappointed. (For the paddlers out there, make sure you bring your own canoe/kayak, there are no rentals on site.)
Directions
Location: Sherando Lake Recreation Area, 96 Sherando Lake Rd, Lyndhurst, VA 22952
From I-64: Take exit 96 just east of Stuarts Draft. Turn south onto State Route (SR) 624 and continue. At Lyndhurst, the road changes to SR 664/ Mount Torrey Rd, but there is no distinct turn. Continue south on SR 664 approximately 8 miles to the entrance to Sherando Lake Recreation Area on the right.
About 1 mile down Sherando Lake Road from SR 664, head right for a small parking and lake access area or left for parking, lake access, restrooms, information, camping, and hiking trails.
From Royal Oaks, travel north on SR 814 for 3.6 miles to SR 664. Continue straight onto and follow for 0.6 miles before turning left onto Sherando Lake Road.
To return to the interstate, return to the Blue Ridge Parkway and follow it south to SR 56. Turn right and follow this to I-81. From here, turn north to begin the Forest Trails Loop or south and start the Rockbridge River and Ridge Loop.