
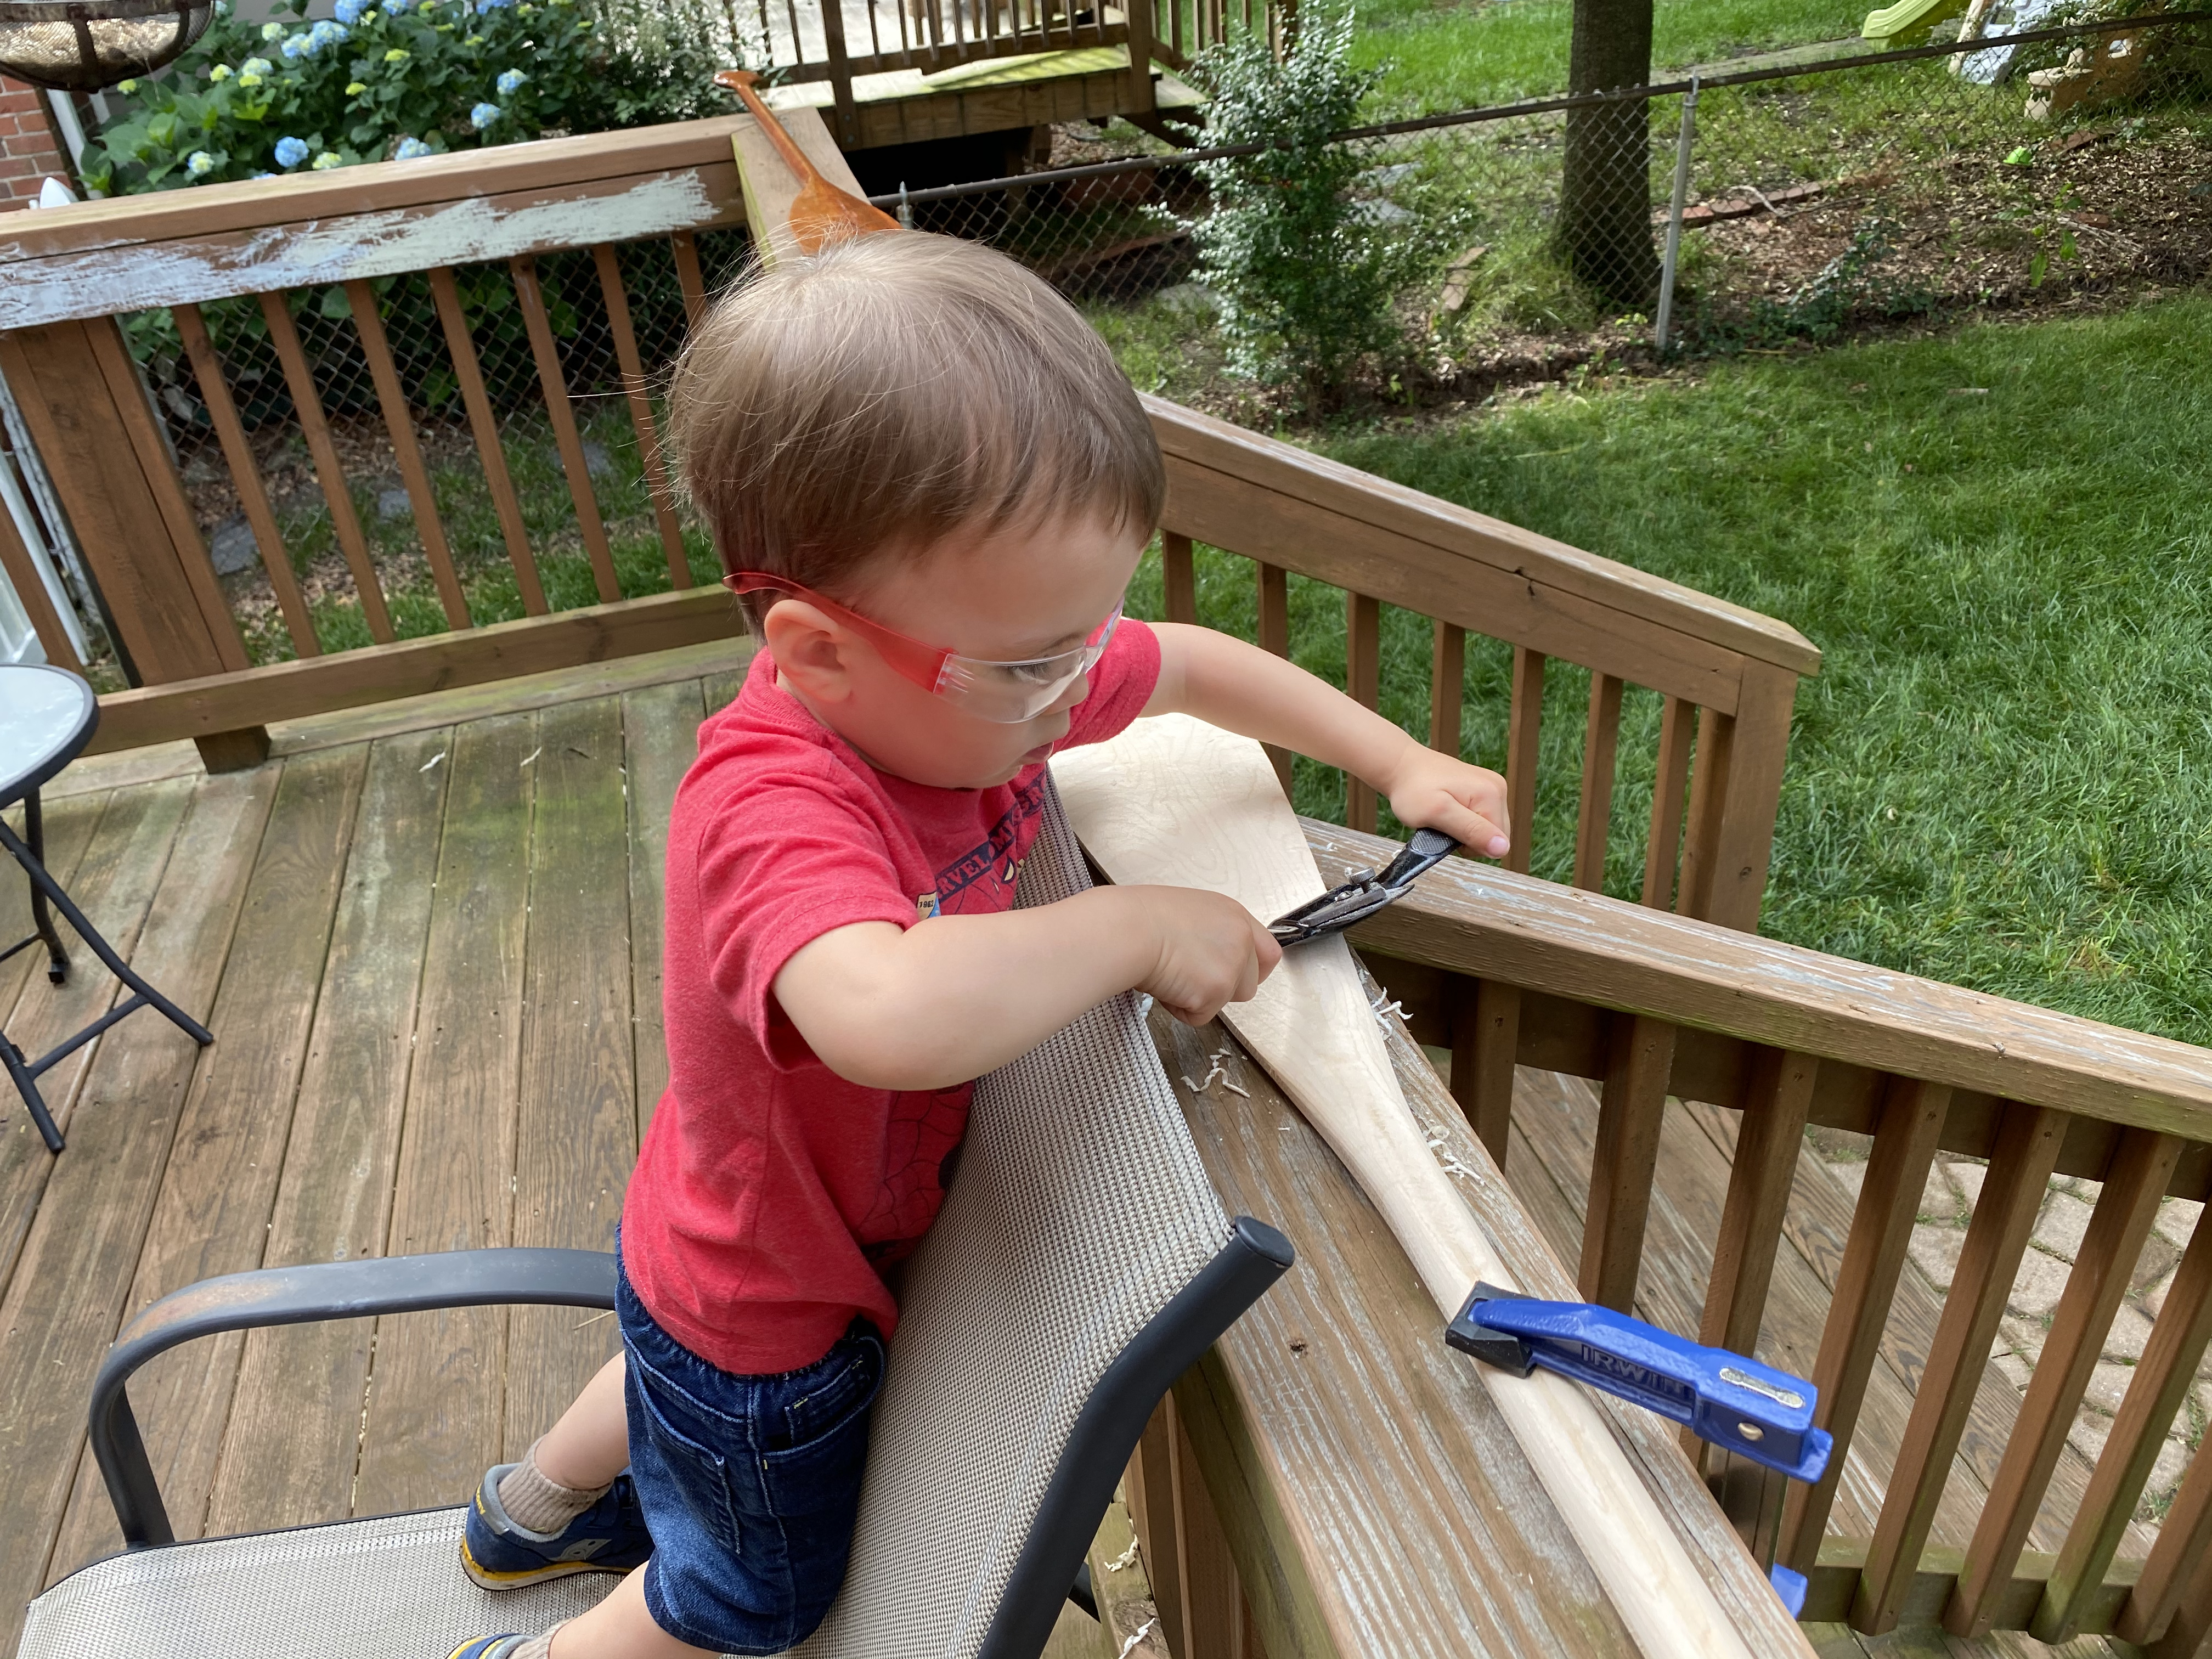
From the moment he stepped foot in a canoe, my son has never been satisfied with just sitting and taking in the views….. He wanted to paddle! He was not even 2 years old and at the time there was not a paddle small enough for him. This was my chance to make him one. As with all projects, we both learned a lot and had a blast making it.
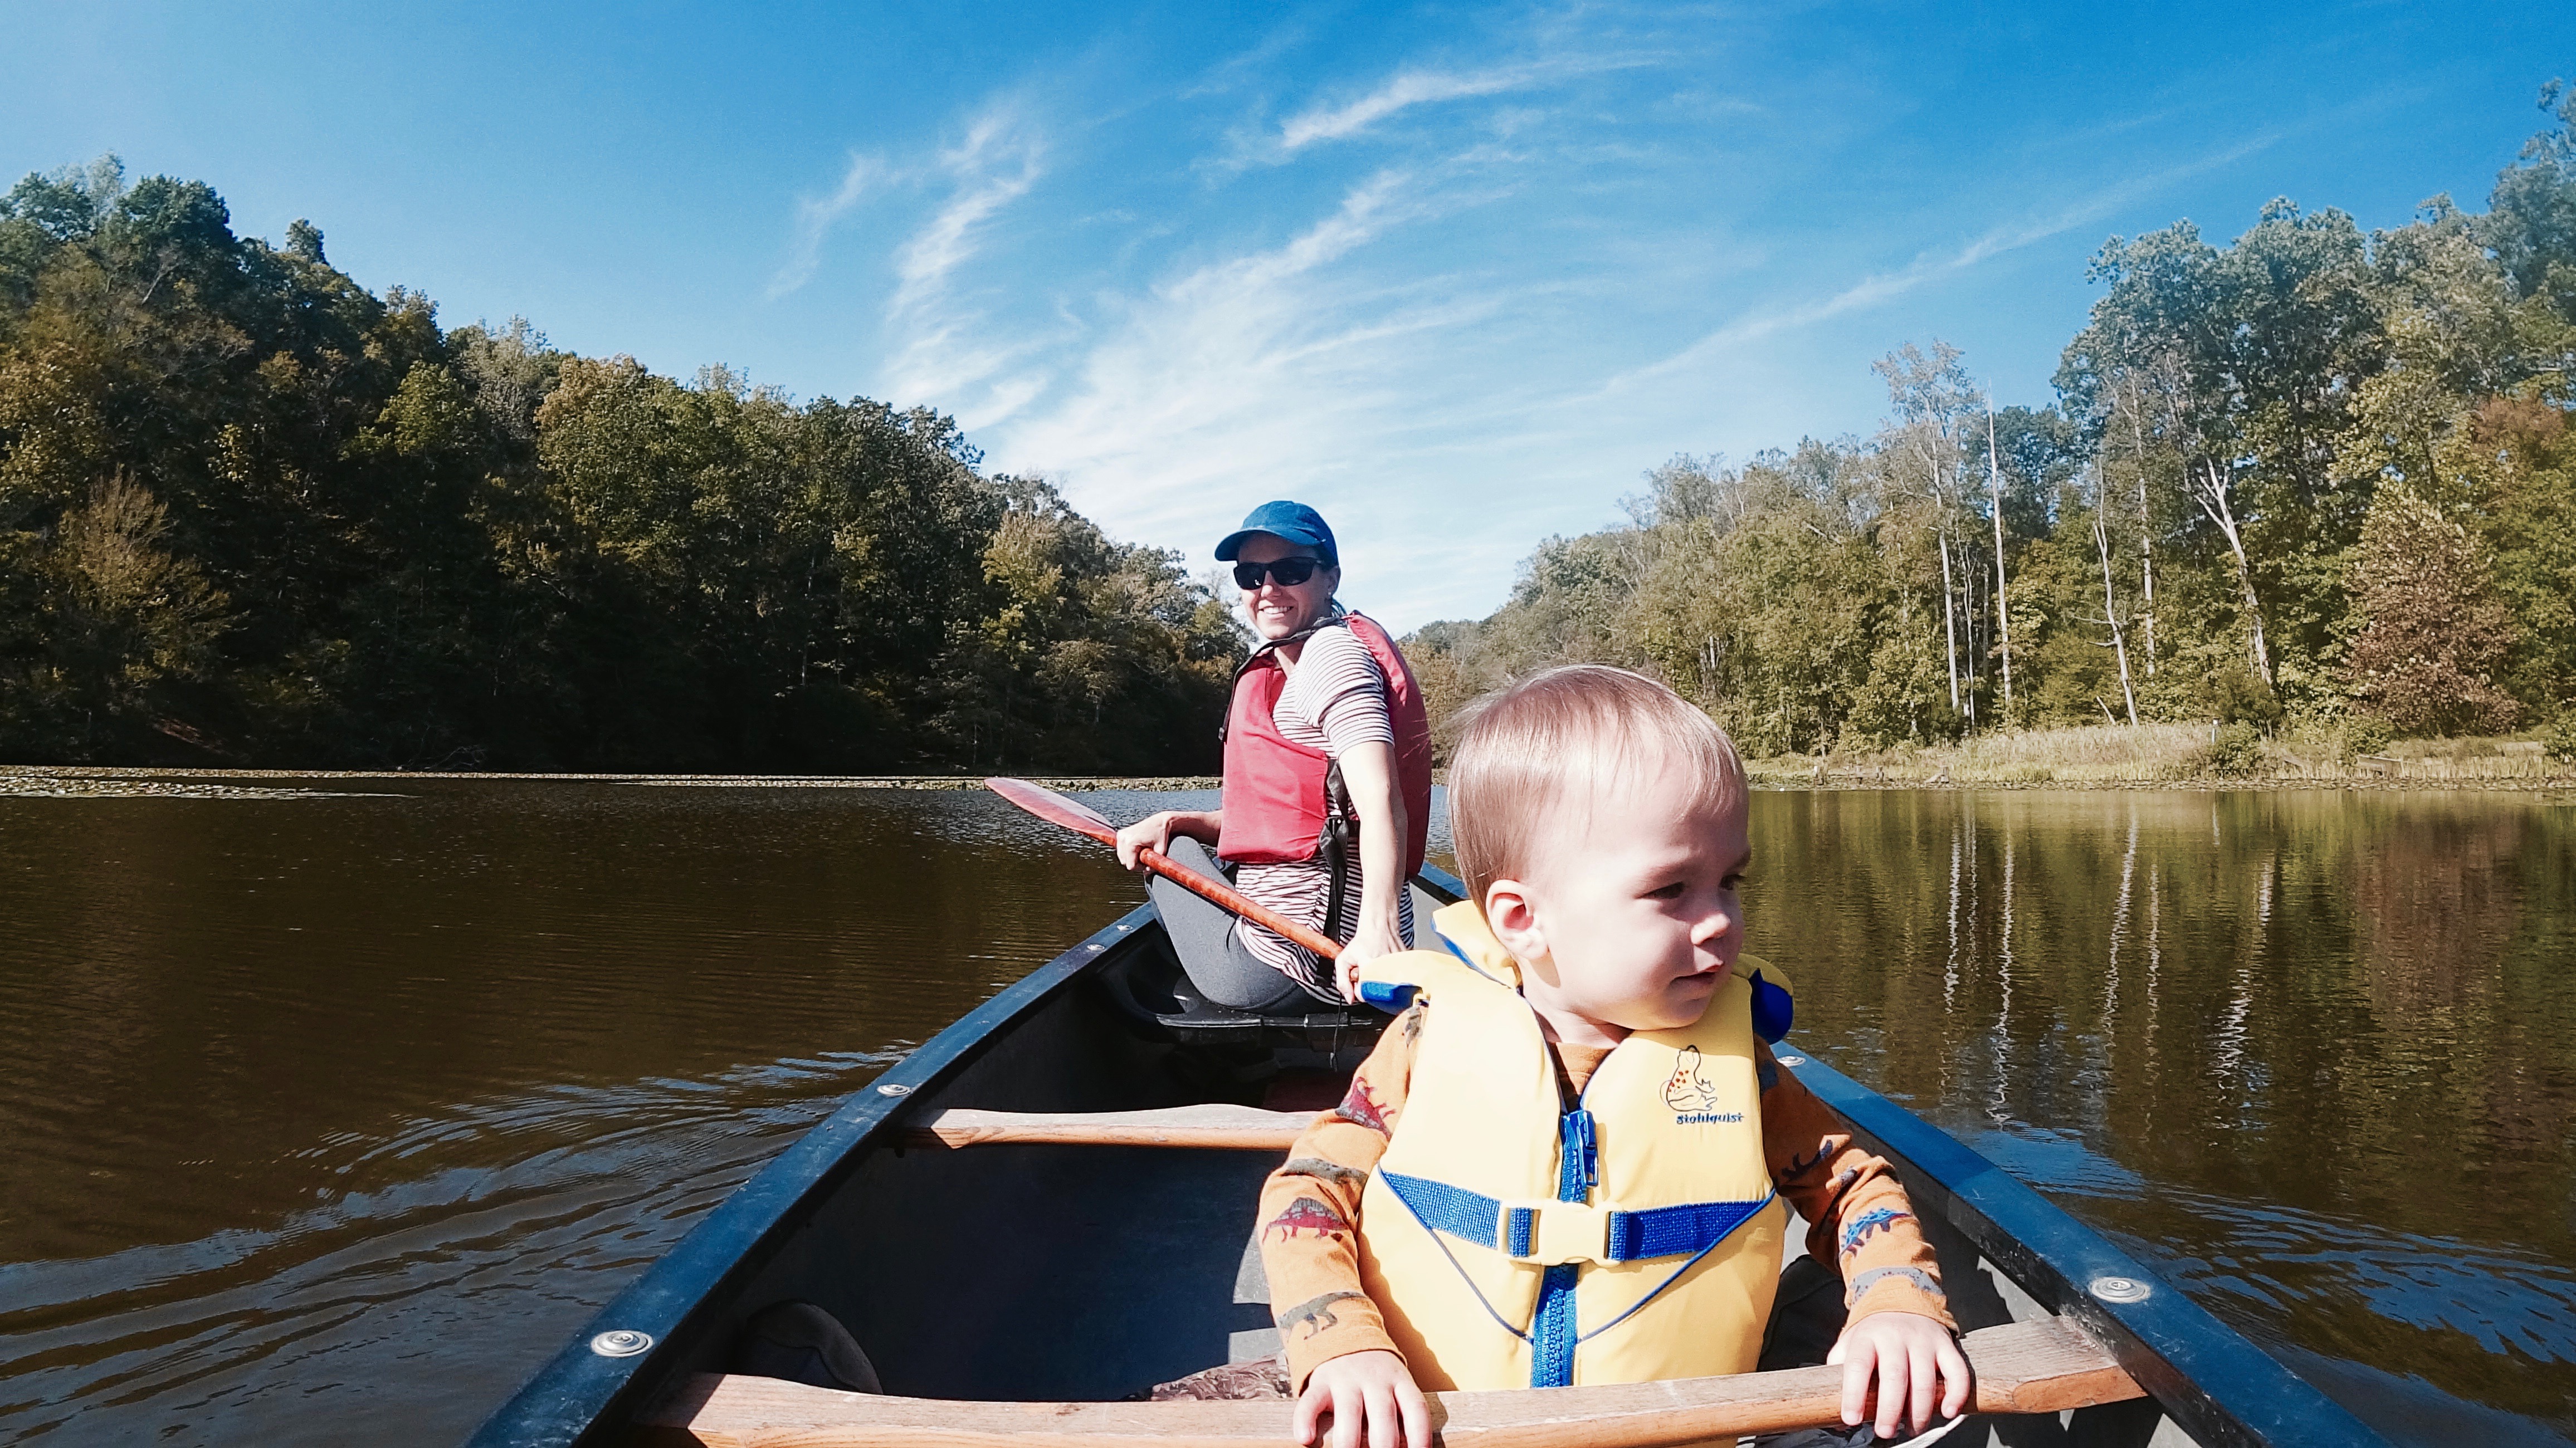 His first canoe trip.
Selecting the wood:
Traditionally, canoe paddles are made from hardwoods. The definition of a hardwood is a species of tree that will yield a seed that has a coating on it, either in the form of a fruit or a shell. (Oak, maple etc). Softwoods, yield seeds that do not have any particular coating. Example: many conifers. The terminology is sometimes misleading because there are some softwoods that are actually harder than hardwoods, but in general, hardwoods are usually indeed harder. These trees take much longer to grow to the equivalent size and as a result are usually denser.
For a project such as this, you will likely not find the board of wood that you need from Lowes or Home Depot. Your best bet is to go to your local lumber mill or wood working store. In this case, we were fortunate enough to find our wood from Woodcraft. If you haven’t spent much time in a lumbar yard, some of the terminology might be confusing. You will hear the term “board foot”. This is the unit for which wood is sold. IT is misleading because it is actually a unit of VOLUME not length. A board foot describes a piece of wood that is 1inch thick, by 12 inches wide, by 12 inches long. Hence 144 cubic inches. For our project, we used a 3′ x 1” x 4” foot long piece of hard maple.
When you are selecting the wood, make sure that there aren’t any knots or wood defects in the areas that you will be using, ESPECIALLY in the shaft of the paddle. These knots can lead to weakness in the paddle and could eventually fracture down the road.
Equipment/Materials:
- hand bench plane (I used a #4 Wood River plane)
- spokeshave
- jigsaw or bandsaw
- sandpaper (120 and 220 grit)
- woodburning pen (optional, if you want to add designs to the wood)
- clamps
- tack rag
- spar varnish
- woodstain (if you want to stain the wood)
- linseed oil (optional)
- orbital/hand sander
- protective eyewear
Selecting the design:
When selecting the design of the paddle, keep in the mind where the paddle will be primarily used. Is it flat water? whitewater? tripping? leisure paddling? There are numerous types of canoe paddle designs to choose from. These mostly differ in the shape of the blade of the paddle. Different paddle shapes will move different amounts of water. I’ve always prefered the beaver shape paddle, it is not too wide and it is not too narrow.

The Woodworkers Journal: provided a template for one of their Northwoods canoe paddle. A beavertail shaped paddle. I didn’t use these exact dimensions because we are completing a scaled down version for my 2.5 year old son. But I was influenced by the overall shape. Notice how the design templates are for one half of the paddle, when you are finished tracing that half, flip it over and trace it again to create the complimentary side. This will allow for the most symmetrical template possible. If you’re going to making many paddles over the years, consider making this template out of wood for safe-keeping over the years.

Once the outline has been drawn on the paddle, use a bandsaw or a jigsaw to cut out the paddle. If you spend extra time making the cuts as precise as possible, this will save you time later with the hand carving, shaving and sanding. I used a Bosch jigsaw.
Here is the video of the northwoods canoe paddle making process.
2. Planing
 The key point to make during the remainder of the carving process is to maintain symmetry through the axis as well as throughout thickness. Use a gauge to mark the very center of the board on it’s axis as well as its thickness. The line, will let you know how close you are to your desired thickness of the blade. You may decide to vary the wood thickness based on the type of wood as well.
When working on a project like this, I want to emphasize the importance of knowing your tools and how to maintain them and to keep them functioning at their very best. There is no better example than the bench hand plane. If your tool is properly sharpened, maintained and tuned, this part of the project can be the best part. If your plane is not set up correctly, this could lead to a very frustrating experience.

In addition to keeping your tools finely honed, it is crucial to take into account the wood’s grain direction. Ideally your board is free of knots, this will make for the easiest planing. If there are knots, just be cautious of the grain drain direction change in these areas which could leave to tear outs. One way to battle this is to take shallower cuts if necessary. There are numerous tutorials online about how to read grain direction on a board.
Here is a useful video on how to set up a hand plane.
The Handle
The handle is probably the most difficult part of the carving process. There are many different methods to tackle this portion. Some paddle companies will actually do this part all by a large drum sander. Others will use files to whittle away the handle. I prefer to use the spokeshave, although this can be a little, especially if you are making sharp turns. I sanded parts of the handle afterwards with a belt sander.

Watch this craftsman at Shaw and Tenney (an oar and paddle company based in Maine) shape most of the paddle using a large drum sander. Some people will say that this method is not truly “hand made”. Nevertheless, the precision is impressive.
Woodburning
This step is entirely optional; I really wanted to put a logo on our canoe paddle, with a maple leaf (representing our Canadian heritage) and an oak leaf to represent our currrent home, Virginia. Similar to the wannigan I constructed, the wood burning process is a very enjoyable part of the paddle making process. Now if you were a professional furniture or paddle maker, you could consider just getting an ironing brand. Who knows? Maybe one day we will start canoe paddle business. It certainly seems like there are quite a few out there. There is one paddle company in Minnesota named: “Sanborn Canoe Company” that appears to be doing well. They specialize in artisan paddles.

The finish:
There are different ways that you can finish your canoe paddle handle. While some people will varnish the entire paddle, others leave the handle unfinished. I opted for the latter. I left the handle unfinished and unvarnished. I later added 3 coats of boiled linseed oil on the handle. The decision to oil or varnish your handgrip is purely personal preference. I found that over long canoe trips, the feeling of a varnished hand grip can make your hand a little raw after thousands of strokes. Finishing with linseed oil, gives the handle a buttery smoothness, similar to an axe handle. Over the years of use, the grip will darken naturally.
 Personal preference, but I left the handle, unstained and unvarnished. I used 3 coats of boiled linseed oil to give it a buttery smooth finish, that will feel much better in the hands. Over time, the wood will darken naturally from the oils on your hand as well as the elements.
In conclusion:
For the canoe enthusiast, I can’t think of a more rewarding experience than using a paddling that you’ve created. It is also a fantastic father son bonding experience. As with other projects, I always find that I learn so much from even the smallest of projects. In this case, the big take home point, is that maintenance of your tools and knowing how to calibrate and hone them is essential to getting a precision job done. The hand plane was a joy to use once sharpened and calibrated. This holds true for the spokeshaves as well. Obviously with any project, the use of a work bench with clamps to suspend your work also makes the task of carving your paddle infinitely easier. Have fun.


**This is the best canoe paddle carving I have found on the internet. It features Ted Moores (craftsman) and this video from the 1990s was produced in Ontario, Canada.**

Maiden voyage…..all smiles

Really nice and informative post. Also great to see your son taking care of the “details”! 🙂
LikeLiked by 1 person
I know/knew nothing about paddles. It looks like you and your son did a good job.
LikeLiked by 1 person
Oh man what a great project! Reminded me of the canoe paddles I made years ago… Including the little Dudes size paddle. Of course those little Dudes aren’t so little any more. But they still love goofing around in the canoe and kayaks. Our paddles were laminated out of strips of old growth western red cedar, all cut from an old log I recovered from the mouth of the Snohomish River. Now that I think about it, the video I posted might have been the “link” that brought us together many years ago. https://youtu.be/MgNhJKXq2Js So thank you for all of your wonderful and inspiring content you create. You are truly my favorite WordPress blog creator. Cheers
PS: My first attempt – https://youtu.be/OONuCnqvy5g
LikeLiked by 1 person
Thanks for the kind words Kat. And yes, you are absolutely correct, I distinctly remember watching that video of you turning an old log into a canoe paddle. I watched it again before starting this project! Great stuff Kat. You are definitely way more productive than me when it comes to getting things done ex. building Mowich Camp, making paddles, and cranking out videos, and lately wildlife photography which I really enjoy. Definitely a wordpress bromance. I hope you and the family are all well out west. Cheers, John.
LikeLiked by 1 person
I enjoyed reading this John! You made a beautiful paddle for your son.
Greetings from the homeland.
David
>
LikeLiked by 1 person
Thanks much for the kind words David, we had a blast making it. Will hopefully dip it in Ontario waters one day. Hope all is well with you up north. Good health to you, John
LikeLike
[…] very quiet and peaceful. This is where they learned how to paddle and this is where my son used his homemade canoe paddle for the first time. Thanks for everything summer 2024 you’ve been a great one. Wishing everyone a safe, healthy […]
LikeLike