


Last year, we felled an old chestnut oak tree in our front yard that had succumbed to illness. We were certainly sad to see this magnificent old tree fall. We took that opportunity, to teach the kids about the cycle of trees and we ended up growing our oak own trees from acorns to continue the cycle.
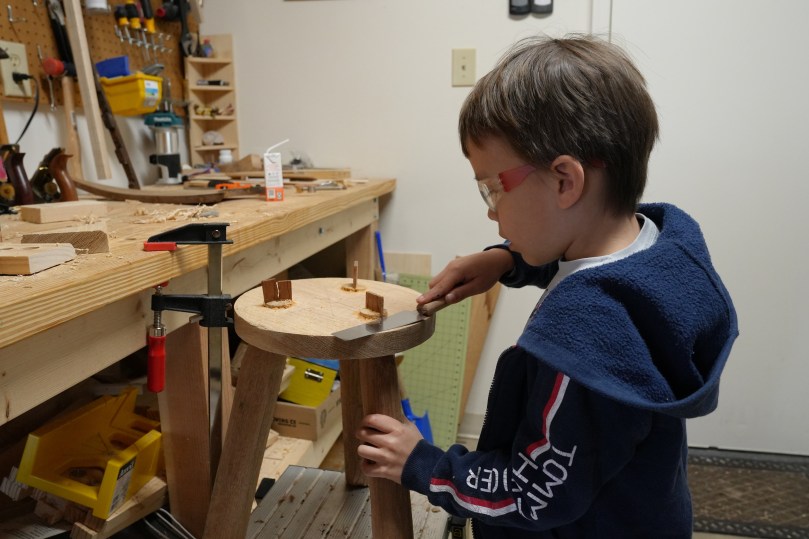
We split the oak into many cords of firewood and left it to dry. About a year later, we decided to find a way to let to celebrate this old tree – we were going to turn it into a milking stool. Why you ask? Because we have several cows that need milking. No, just kidding. As the kids become more involved in the workshop, we needed another stool for them to sit on. Also, it is a great project for using hand tools. Power tools would make it certainly easier, but where is the fun in that. Also I guess they are too young for that.


It appears that milking stools have been around for at least 2000 years. The 3 legged design allowed milkmaids to get low to the ground and lean forward without toppling over. Also, the 3 legged design was more stable on uneven surfaces than a four legged design. In 19th century England, cows could be milked in the fields or in cowsheds. These were traditionally constructed out of elm with legs of ash. Our milking stool will be much heavier, we are using chestnut white oak for the legs, and then white oak for the seat. It will be a very Virginian stool (we love white oak).

After selecting 3 pieces of chestnut white oak, we got to work to make them as cylindrical as possible. This was done using 2 different draw knifes. We have a “rough” draw knife, that we use to strip bark, and then a finer, sharper one for the more precise work.
I purchased a board of white oak from the local woodcraft to cut out of a circle for the seat. Using a Number 4 hand plane, this was then smoothed to remove all rough spots and to flatten it as much as possible. 3 points equidistant from each other were then marked out on the seat using a compass. I used a bevel gauge as a reference to gauge 20 degrees from the normal. This is the angle at which I will be drilling out the mortises for the legs. I used a forstner bit at 1 3/4″. Once these holes are drilled. The tenons were then finely shaved to fit through the mortise. The tenons were then cut into, to allow room for a wedge to be driven.
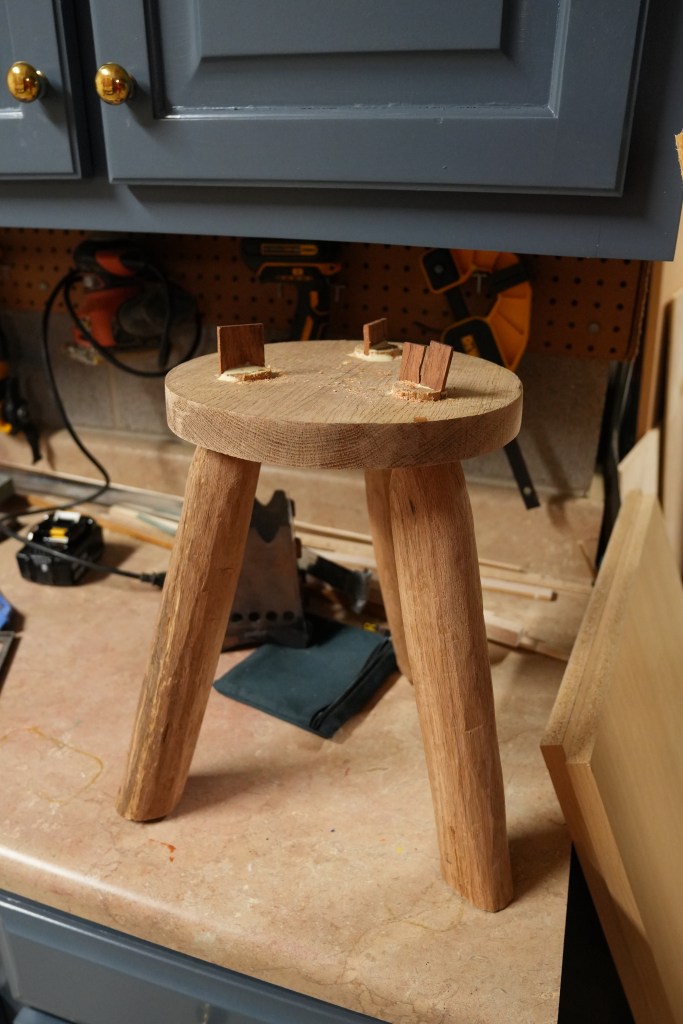
For the wedges, I wanted a different type of wood that would stand out visually. So I used an old piece of teak. These were then sanded down to the shape of a wedge. Once the tenons were securely placed through the mortises, the teak wedge was then glued and driven through the cut in each tenon. This will keep the joint tight.
Once it has dried, you can cut off the excess wood with a saw. A block plane can help level the seat once again and then sanded. The legs were then leveled with the ground and cut. All edges of the legs were chamfered in order to reduce the likelihood of the legs splitting and chipping.
For the finish, we kept it very simple with a couple of coats of boiled linseed oil, this certainly helped to bring out the grain of the oak. For the last coat, I applied a layer of beeswax.

Overall, it was a very fun project to do with the kids. There was a lot of cutting, shaving, hammering and sanding. What more could you ask for? Now, time to find a cow.


Be safe when working with tools! Make sure you’re wearing the proper eye protection! Have fun and be healthy!

Your children are SO fortunate to have parents interested in this kind of activity! What a great project.
LikeLiked by 1 person
Thanks muchos! The garage is definitely our happy place! haha
LikeLiked by 1 person
What a fun project for your kids, John. So much learning and feelings of accomplishment! 🙂
LikeLiked by 2 people
Thanks Jane! we loved working on it and the kids love using the stool these Days! Thanks for checkin!
LikeLiked by 1 person